Docker is an emerging technology that is gaining popularity around the world. It is a containerization platform that helps you to build and deploy container-based applications on different platforms.
With Docker, you can easily break down the complex applications into microservices stored within a container. You can deploy these containers on various platforms without worrying about the underlying system specifications.
Docker leads to less resource consumption as it shares the underlying OS kernels. If you are an IT operations professional, then you might understand the benefit of implementing Docker technology within the DevOps lifecycle through the software development phase.
Disadvantages of VMs and the Emergence of Docker
Earlier, virtual machines solved the requirement of running various applications isolated from each other but resulted in high-resource consumption and were also hard to handle. Docker came into the picture and solved the shortcomings of VMs.
You can run Docker efficiently either on-premises, over the public cloud, or in a hybrid setup. Docker is based on containers, images, volumes, and networks that can be run on the same host without interfering with each other’s work. Handling multiple containers at the same time has become more comfortable with various tools from Docker and third-parties.
Docker is an open-source project which comes with a large, expanding community support. It has been available since 2013. Over its run, Docker has provided immense growth to the containerization and microservices concepts.
Docker displays cross-platform compatibility. In this article, we will learn how to install Docker on Linux. Before going into that, let us first know the prerequisites for installing Docker on Linux.
Basic Prerequisites for Installing Docker on Linux
With this article, you will be able to install Docker simply. But you must fulfill the necessary system requirements to start with the process, which are:
- Ubuntu 18.04 or newer 64-bit version.
- Create a user account with sudo privileges for Ubuntu to run the Docker commands.
- If you do not have basic command-line knowledge, groom yourself with basic command-line/terminal knowledge.
- Navigate to the Terminal (CTRL-ALT-T or Applications menu > Accessories > Terminal) for running Docker commands, like installing and setup.
- You should have a Docker repository that will store the Docker software (OPTIONAL).
How to Install Docker on Linux?
If you have installed Docker on your system already, please check and confirm that the Docker’s installation package version is the latest.
If the installed Docker software is not the latest one available, then you should try installing the latest version from the Docker repository. Once you confirm the version, you can simply start with the below-mentioned steps:
Step 1 – Updating the Docker packages
To update the Docker system and packages, you have to run the following commands:
sudo apt update
sudo apt upgrade
Having an updated system will provide a compatible environment to run further commands in Docker.
Step 2 – Deleting the Docker’s older version
If you have the older version of Docker installed on your system, you can run the below command to get rid of it:
sudo apt-get remove docker docker-engine docker.io
Step 3 – Install the Docker prerequisite packages
You should have the proper Docker package to extract the Docker files and related installation details. For downloading the required Docker package, you can run the below command:
sudo apt install apt-transport-https ca-certificates curl software-properties-common
where,
- apt-transport-https –> It will use the https secured connection to transfer the required files and data.
- ca-certificates –> It will confirm the validity of the security certificates for the web browser and your machine
- curl –> It will transmit the data needed
- software-properties-common –> You can add the script using this parameter to manage the software.
Step 4 – Adding GCP key for Docker
You can add the Docker’s GCP key using the command below:
curl -fsSL https://download.docker.com/linux/ubuntu/gpg | sudo apt-key add –
A demonstration of the same is:
 Step 5 – Docker repository is added to the APT resources
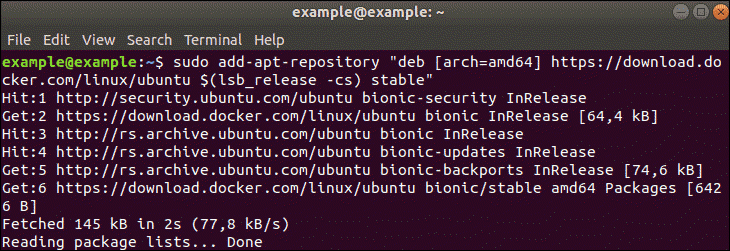
If you want to use the official method to install the Docker, then you should add the latest Docker repository to the resources. You can run the following command to ensure that:
sudo add-apt-repository “deb [arch=amd64] https://download.docker.com/linux/ubuntu $(lsb_release -cs) stable”
You will see something like this:
Step 6 – Running the package database update
Once you update the repository, you can update the list of packages with the help of the latest updates repository. If you want to update your package database, you can run this command:
sudo apt update
Step 7 – Checking and Confirming the Docker repository
With the below command, you can make sure that you are installing the Docker repository rather than the Ubuntu default repository:
apt-cache policy docker-ce
After running the above command, you will get the following output, of course, with a different version number:
 Step 8 – Running the Docker installation command
With the following command, you can install the latest version of Docker on your system:
sudo apt install docker-ce
But if you want to install a particular version of Docker, you can run the below command in the terminal window:
apt-cache madison docker-ce
You’ll get a screen like this:
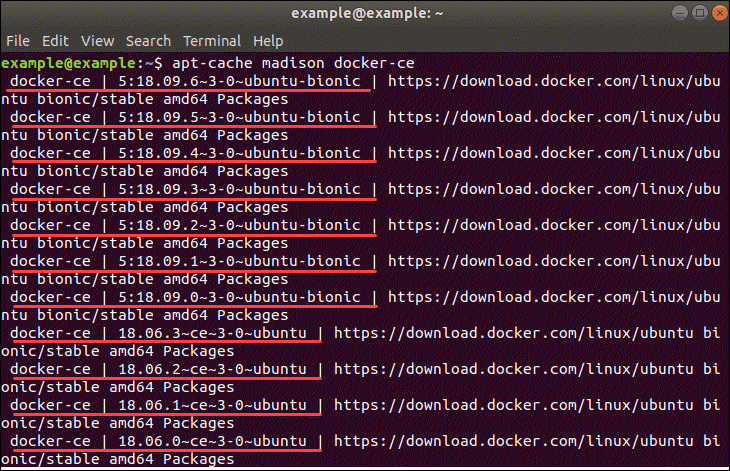 Once you run the above command, you will get a list of the available Docker versions. Now you can run the below command with the particular version of Docker that you want to install on your system:
sudo apt-get install docker-ce=[version]
For example:
![sudo apt-get install docker-ce=[version]](https://kuberty.io/wp-content/uploads/2021/02/sudo-apt-get-install-docker-ceversion.png)
Step 9 – Checking the running Docker version
To confirm the installed version of the Docker on your system, run the following command:
sudo systemctl status docker
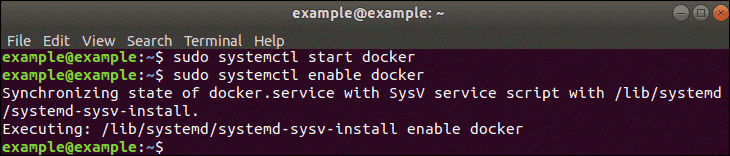
Step 10 – Starting the Docker version installed on your system
To start the installed version of the Docker on your system, run the following commands:
sudo systemctl start docker
sudo systemctl enable docker
Step 11 – Confirming the Docker’s version
Docker comes with a command that allows you to check and confirm the installed Docker’s version, this is:
docker –version

Steps to Install Docker Using a .deb Package
To install the Docker manually, you can install it from the .deb file. Here’s how to do it:
- Step 1 – Go to the Docker download page.
- Step 2 – Navigate to pool -> stable -> amd64. This amd64 will indicate the stable Docker release for Ubuntu 18.04 version.

- Step 3 – Once you select the Docker engine, the .deb package will get downloaded automatically. Make sure you save the path of the file downloaded.
- Step 4 – The below command allows you to download and start the Docker installer:
sudo dpkg -i /path/to/docker.package.deb
Once you run the aforementioned command, the installer will start the process of installing Docker on your system with Ubuntu.
Install Docker With the Help of a Convenience Script
You can also install the testing version of Docker using a convenience script. This installation method, however, will not work if you are working in the production environment or if you already have Docker installed on your system.
Check and confirm the script before you download and run it. Once you get the script from the above-mentioned link, run the following command:
curl -fsSL https://get.docker.com -o get-docker.sh
Run the following command to start the installation process of Docker:
sh get-docker.sh
Running the Docker Commands without Sudo Access
You can work with the root user or the Docker group user to run the terminal Docker commands. While installing, the group user will be created automatically. If you run the command without using the sudo access or the group user, you will get the below output, for instance:
docker container run hello-world
You will get the error unable to find the image. You have to add the working user to the Docker group to avoid the error. You can add the user by running the below command:
sudo usermod -aG docker ${USER}
You have to logout and then login back again to allow the changes to take effect.
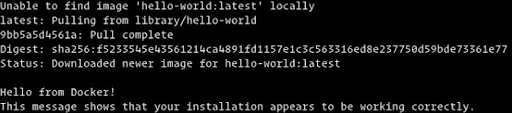
Start the Docker on your System
Once you are done with the Docker installation, you should now check running the test image using the below command:
sudo docker run hello-world
As you install Docker, you will have some images on your Docker repository. You can check the available Docker images using the below commands:
sudo docker search [search_query]
sudo docker search ubuntu
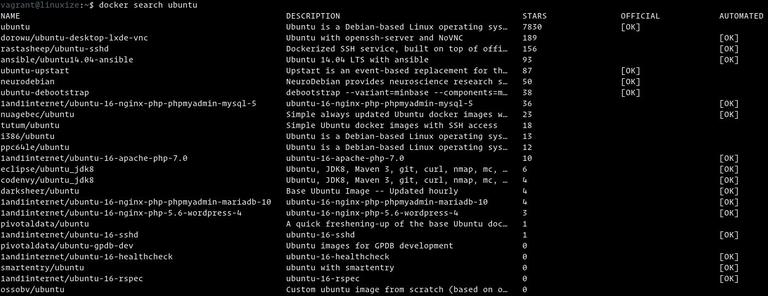 With the help of the above command, you can search for a particular image present in the Docker hub. It will display the list of all the Docker images that match the provided image string.
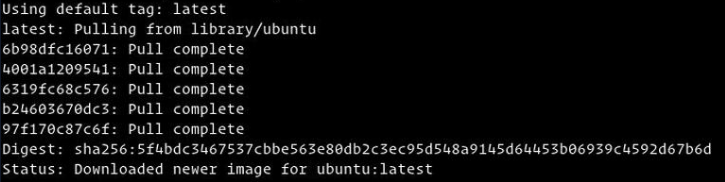
Docker comes with a command that helps you to pull the image to your local machine. You can run the following command that will specify the image name, and the latest image will get pulled, if available:
sudo docker pull ubuntu
Once you have pulled the image, it will help you run the container with this command:
docker run ubuntu
There are several images available. To pull every image on your machine, you can run the following command:
sudo docker images
Conclusion
Now you will be able to successfully install and run Docker on your system. With this blogpost, you get to know some essential Docker commands working with images. After reading it, you can easily install Docker on your Linux distribution, which, in this case, is Ubuntu 18.04.
If you have a basic knowledge of the command-line, you will get through the Docker installation instructions easily without making a considerable effort. Post Docker installation, you can get started with creating and deploying Docker applications. All the best!